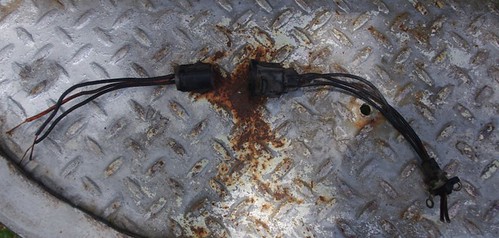
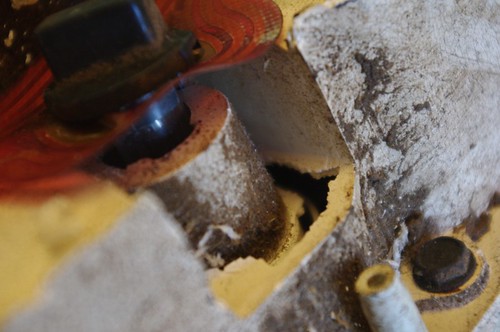
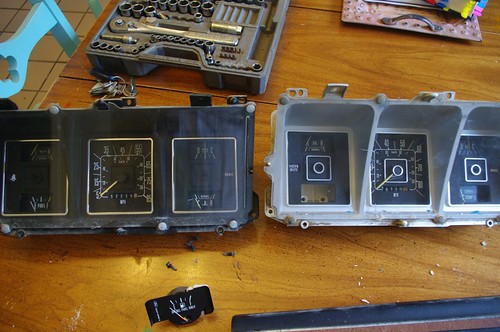
Thursday, June 13, 2013

Instrumentation

My instrument panel was not operating.  The lights did not come on and the gauges worked intermittently.  I pulled the panel out and noticed that the plastic backing was absolutely disintegrating.  It turns to dust where ever you touch it.
Dirty and decaying instrument panel Broken bulb socket

I read on Ford Truck Enthusiasts that this instrument panel was used on Ford vans up until 1991.  They changed the composition of the plastic in 1981 and the newer ones hold up much better.  Off to the junkyard!

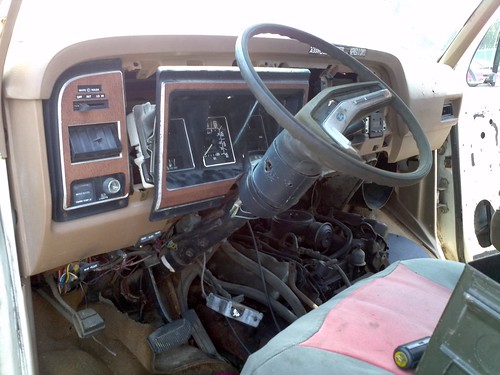
Right there in the first row was an '85 Ford Econoline.  Just like we had when I was a kid, it was even a diesel!
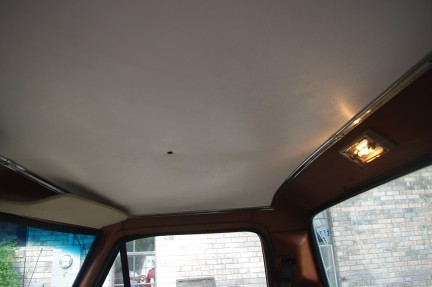
1985 Ford van with the 6.9 liter diesel Pristine instrument panel

A lot of these old vans had warning lights instead of oil and amp gauges, but this one had the full set of gauges.  I was in and out in about 15 minutes.
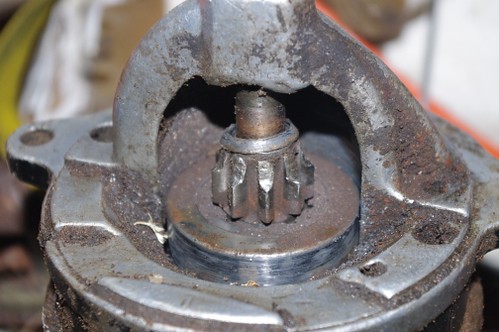
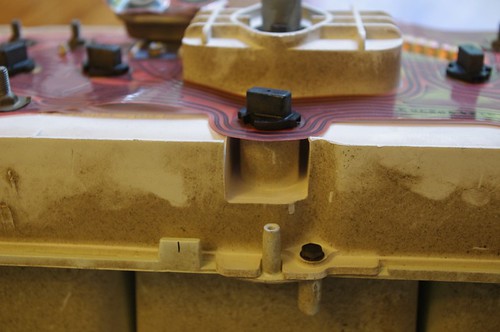
New panel front New panel rear.  Dirt, but no decay

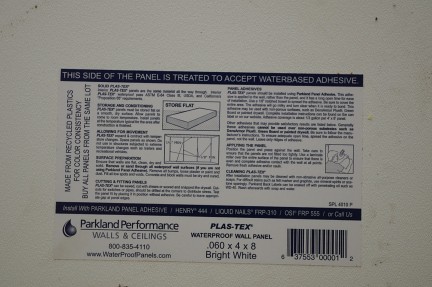
There were a couple of minor problems.  First this van was a diesel, which means the fuel gauge says "DIESEL FUEL ONLY."  Second, the odometer reading does not match mine.  I decided to switch out the fuel gauges.  I don't want someone borrowing the truck and putting diesel in it accidently.  The odometer I am just going to leave.  The title to the truck lists "99,999" for the mileage ("beyond mechanical limits" basically), so there is no legal issue with an incorrect odometer reading.  I documented the readings of both so one could calculate the correct(?) mileage.  If I ever sell the truck, I will include the old instrument panel.

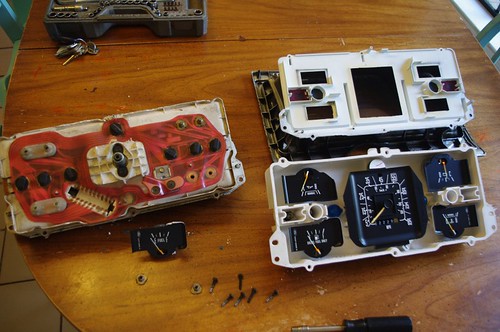
The fuel gauge swap was very easy, although old panel crumbles every time you touch it.
Mid-swap Done

Unfortunately, the lights still don't work.  I think I have a problem up stream somewhere, but the new panel looks great in the truck.  I'll update with some pictures of the finished product.

Tuesday, June 4, 2013

Progress

In addition to the headliner, my friend Andrew and I finished some other projects on the truck last weekend:

I believe that my distributor fouling was caused by the reluctor contacting the magnet in the coil pickup and grinding off material. The coil pickup is almost $30 and the relutcor is $15, but a whole new (remanufactured) distributor is only about $50.  So I decided to just replace the whole thing since it comes with the reluctor and pickup.  Also my distributor already had a lot of gunk it in.  My problem was that if I replaced the distributor, the new coil pick up comes with a plug that snaps into the wiring wiring harness, but my truck doesn't have the plug. The current set up is just spliced into the harness.  


Dirty distributor and ugly splice
So my choices were: A) cut the new plug off and splice it in like the old one or B) find a plug, splice that in, and then plug it up correctly.  I wanted to go with option B, but my local yard doesn't have a truck like mine and you can't buy just the plug new.  Fortunately, by using ShowMeTheParts.com, I found that I could get the same plug from any of almost 250 vehicles.  Surely they have one of those at the yard.

I also wanted to get two door jamb switches.  Again, ShowMeTheParts gave me a list of 75 vehicles that use the same switch.


Sure enough, the we quickly found everything we needed at the local yard.  The coil pickup plug ended up coming off an '85 Bronco.  I also found a rim and tire to use as my spare.  It even still held air.

Coil pickup plug ready for splicing
The door switches were installed in about 2 minutes.  Now my dome light comes on when I open the door.   

We picked up some heat shrink and soldered the pickup plug into place.  After carefully marking the distributor position, we dropped the new one in.  I also tightened up the connection on the low voltage side of the coil.  I think that had something to do with the stalling as well.  I got this connector from the Bronco as well, but decided it would just be easier to tighten mine.  I'll hang onto that one just in case.


Truck fired right up with all the new parts.  It still had some hesitation which I hoped the new distributor would cure, but it runs pretty well and I haven't had any stalling issues. 


Sunday, June 2, 2013

Headliner Project Phase 2

So with my friend Andrew in town, I wanted to tackle the headliner.  Mine was completely missing (including trim) and just the insulation was showing.  In a previous post, Phase 1, I described the headliner that I found.  Long story short, it was not suitable to install, but I thought I could use it as a pattern.

I had seen a few examples of people doing it this way.  This example uses fiberboard.  I liked that direction, but I had my doubts that it would be flexible enough.  People use steam to make it conform to the contour of the roof.  I wasn't interested in striping the interior and pumping steam into the cab, so I looked for another material.  I thought something plastic would be a good combination of flexibility and durability.  Andrew went to Lowe's with us and we settled on this stuff:
Headliner material
It is vinyl wallboard .060 inches thick.  It is meant for wall covering in showers and such.  They had some similar stuff that was a good bit thicker.  The thicker material probably would have worked better, but it was $34 versus $19.  The whole point of this project was to save money, so we went with the cheaper one.

It was easy to cut with a utility knife.  We traced the old headliner and cut it about three-quarters of an inch bigger all the way around.  The original piece had cutouts for the screws.  The screws don't actually hold the headliner up.  Instead, the trim clamps it to the roof.  We did not make the cutouts and screwed through the trim and vinyl.  The only exception was on the rear of the headliner, but in hindsight, I would have left those out too.  The vinyl is not as rigid as the original material and it needs more support.

It was good that we cut it big because we only needed to trim in a couple of places.  It went in easy enough.  The only difficult part was finding the hole for the center screw.  There was no way to see it, so we just had to feel for it with a pin.

Here is the finished product.  It sags slightly, but it isn't really noticeable.  I am pleased with the result.


Friday, May 17, 2013

Another Bittersweet Day

I've been doing little things here and there to the truck. Each one seemed to help. I put on a new distributor cap and rotor, replaced the vacuum advance hose, and sealed the distributor cap with dielectric grease. I wanted to try to recreate the stalling issue so I could troubleshoot the issue. I started out driving around the the block for a while. No problems.

I decided to run by the store to see if they had the coil pickup in stock. They didn't and the truck didn't want to start when I came out. This situation didn't really fit the issue I was trying to recreate, but I decided to start running through my checklist. The accelerator pump was squirting gas into the carb; however, the fuel filter was almost empty. Is it possible for the accelerator pump to be working, but the carb not to be getting gas? I was cranking it over, trying to test the ignition, and suddenly the fuel filter filled up and the engine started.

The fact that the situation was not really the same and that this appeared to be related to a fuel issue makes me think that this may have been a different issue altogether. It has always been a little hard to start when hot. I wonder if the fuel is boiling in the line when it passes near the exhaust manifold.

During this whole process, my frustration with the starter reached the breaking point. I was tired of thinking about the stalling issue and I was tired of the started not catching, so I decided to pull the starter. Turns out that problem may be an easy fix. I was worried that the ring gear was missing teeth or worn, but the gear on the starter is obviously the problem:

One great thing about replacing parts like this is getting the lifetime warranty. This is the last time I'll buy a starter for the truck.

So I'm not any closer to solving the stalling issue, but my starter issue is going to be easier than I thought.

Friday, May 3, 2013

Headliner Project Phase 1

As I mentioned, I got a headliner with trim and hardware off a donor truck.  The headliner tore during removal, but I think I will use it as a pattern.  Apparently, the trim is a much more important find.  LMC Truck doesn't carry the trim.  

What I salvaged from the donor is pretty rusty, so I tried the aluminum foil cleaning method.  It works well on lightly rusted chrome, but I found that the heavier rust was less responsive.

Before and after.
I think it will be good enough to use.  Phase 2 is cutting out a new headliner.

Monday, April 29, 2013

Another Setback

Today I was confident enough to take the truck to work.  That was a mistake.  I drove it around town yesterday (Sunday) without incident and I thought I had resolved the stalling problem.  Nope.  My office is about 15 minutes away.  About 3/4 of the way there it started missing.  I made there alright, but on the way home that evening the missing got worse and it finally stalled again.  I had to tow it back.

I thought that my problem was with fuel.  I noticed that air rushed into the tank whenever I opened the gas cap after it had been running.  A previous owner had replaced the gas tank recently and I assume that it was not properly vented.  Also, a section of the steel fuel line from the tank to the engine had been bypassed with hose.  I figured that because the tank was not venting, after running for a while pressure would build up and the pump could not pull any more gas.  Seems like a plausible explanation   To test my theory, I started driving it with the gas cap off over the weekend.  That worked for a while and I'm still convinced that it was at least part of the problem.

Now I am considering an electrical cause.  When it stalls, it turns over, but never fires.  Fuel is reaching the carb, because I can see the accelerator pumper squirting gas into the carb.  After it sits for a while (hours) it will start again.  There are some sketchy wire spices between the distributor and the coil (not the high voltage wire).  After doing some research, I think I am going to try to solder those together and put heatshrink over them.

I have also noticed a lot of carbon under the distributor cap.  I have heard of carbon tracking, but this is more of an all-over build up.  I will probably replace the cap and rotor, but I would like to know what is causing this.
Carbon under cap.  The dark spot on the left is where I wiped it with my finger.

Carbon on rotor and in distributor.

Saturday, April 20, 2013

Parts Pull

Today, I visited the donor truck I found on Craigslist.  The gentleman was very nice.  He insisted on pulling any parts that came from under the truck because he didn't think it was safe.  I got:


Seat belts
The seat belts are a nice addition. Pretty faded, but definitely an upgrade.  I did discover one interesting thing.  I had shoulder belts rolled up under the cover where they attach, but they did not have any buckle on them.  Weird.  I think shoulder belts were an option in '76.
New belt installed
Rear brake line
On the rear of the truck, there is one brake line that comes from the front to the driver's side of the rear axle.  There it splits and one line goes a very short distance to the left wheel; the other line goes all the way across the axle to the right wheel.  My line that goes to the right side was crimped off.
Crimped brake line after removal
I replaced the line with the one from the donor truck, which was in good shape.  But now I'm wonder if I should have waited.  They may have crimped that line off because the wheel cylinder was leaking.  Now I just hooked it back up.  I probably need to rebuild that brake.

Headliner
I got the headliner and chrome trim as well.  Unfortunately, the headliner tore during removal.  I may try to repair it or use it as a pattern to make a new one.  I think I can use the 1/8" pressboard they have at Lowe's.  The chrome is rusted, but I am going to try the aluminum foil trick to clean it.

I passed on these items:

  • Weather stripping.  It was in better shape than mine, but not great.  He wanted $20 and I can get a brand new set for $60.
  • Door latch posts.  These are $10 brand new.
  • Glove box liner.  Again, it was in better shape than mine, but not tempting enough.
  • Chrome vent shades.  I actually kind of want these.  I may try to get them later.

Wednesday, April 17, 2013

Donor

I found a '76 Ranger nearby on Craigslist.  Owner has it listed for $800, but is willing to part out.  I hope to grab the seatbelts and some other items for my Punch List this weekend.  I bet I can get that one brake line I need off the rear.

Donor?

Monday, April 15, 2013

Air & Fuel

I decided to replace fuel lines leading into and out of the fuel filter as there was still some minor leakage there.  I also put an air filter on the truck as there had been none.  The filter housing was in the bed.  Thanks to my son Sam for locating the wingnut back there!

I still did not trust it to go very far, though.  I decided to leave it idling for a while that evening.  After about 15 minutes, it developed a pop (small backfire?) in the passenger side exhaust.  I decided to shut it down.  Pretty discouraged.  Lots of possibilities are running through my mind.  It could need a complete rebuild of the heads.  I hope it is something simple like a coil.

Sunday, April 14, 2013

First Weekend

On Friday April 12 it was difficult to concentrate.  I wanted to go home and play with the new truck.  On the way home from work, I bought new plugs and wires and a shift knob (the first thing my wife noticed was that there was no knob).

I installed the knob that night and was able to work on a few things:
  • I got the glove compartment open.  It had been stuck, but a little WD40 did the trick. Upon opening it, I discovered that it needs a new liner inside.  The original ones were cardboard, but they make polyurethane replacements that are pretty cheap.
  • I got the interior light and cargo light working via the switch above and left of the driver's head. I had never seen that switch before.  The interior dome light still needs a lens cover (cheap).
The next day we had people coming over so I was not able to focus on the truck too much. I spent most of the day getting the yard ready for the party.  I had promised the kids that I would take them around the block (no further because the truck doesn't have shoulder belts).  Unfortunately after several jaunts through the neighborhood, the truck broke down near the house. It was discouraging for sure, but with my neighbor's help (thanks Glenn!) I towed the truck home.  Not sure what the problem is, but it won't start at all.  I suspect the carburetor.

I also started my Punch List.

Sunday I installed the plugs and wires.  The number 4 plug was damaged, so it was likely that something was (bad) wrong in that cylinder.  My brother and his friend Will came over to help (thanks guys!).  I had an old, unreliable compression tester which showed around 70psi on number 4.  We decided to try to start it up anyway.  The plugs and wire helped tremendously.  The truck idles very smoothly.  Too smoothly to have something broken off in cylinder 4.

Damaged spark plug

The day ended on a positive note despite a few worrisome moments.

Thursday, April 11, 2013

Purchase

From the Craigslist ad
On April 3, 2013 I emailed a gentleman about another truck.  This one appeared to be in much better condition, although a little farther away.  The owner originally wanted to trade the truck for a Mustang, which I have but did not want to get rid of.  After some emails back and forth I gathered some more information:
  • 1976
  • 4X4
  • 360ci motor
  • 4 speed manual transmission
  • PTO winch included although PTO had been disassembled
  • located MUCH farther away (about 2 hours north)
  • the owner was willing to sell the truck rather than trade
After some more discussion we arranged for me to come up Thursday, April 11.  My friend Carey Hammett graciously agreed to come along.  It stormed violently that day, so there was some question as to whether we would go or not.  Fortunately, the line of storms passed through the area and continued east.  By the time we left, it was raining but not too hard.

We arrived around 5pm.  The owner had the truck running when we got there.  It idled nicely and appeared to be in excellent condition overall.  Very little rust.  Excellent interior.  Clean motor.  We took it for a drive and discovered a few problems.
  • The truck did not run very smoothly at all above idle.  
  • The starter would not catch the flywheel about half the time.
  • The fuel filter was leaking significantly.
My only hang up was the fact that the truck did not run smoothly.  I questioned our ability to make it the two hours home.  The owner assured me that it would make it; he had driven it about the same distance not long ago.  After some negotiation, we agreed on a price slightly lower than his original.  

I immediately drove the truck to a gas station as the previous owner told me that the gauge did not work and it was almost completely empty.  We found that the gauge did apparently work and that the truck had plenty of gas. From the station we drove immediately to an Autozone a couple of minutes away and replaced the fuel filter.  After that we struck out for home.

In the first 15 minutes or so, I had trouble keeping the truck at highway speed.  It would start to stumble and, for a minute or so, would not rev up.  After idling for a minute, it would be okay.  After a two or three rounds of that situation, we had no problem the rest of the way.  The truck did not run great, but it would easily do 70mph on the interstate.

We arrived at home without any further incident.  New truck!


Tuesday, April 2, 2013

First Candidate

I had been watching Craigslist for a while, looking for a 6th generation Ford truck (between 1973 and 1979).  My dad had a 1978 F150 Explorer 4X4 and I always loved the look of those trucks.

My main requirements were:
  • Ford
  • between 1973 and 1979
  • four wheel drive
Automatic transmission would be nice, but not a hard requirement, as my wife can't drive a manual.  I also looked at 4X4s from other generations, but I really wanted a 6th gen.


On April 1, 2013 I found a truck that fit the bill about 15 minutes from where I work.  I made arrangements to go see it the next afternoon.

From the Craiglist ad

The truck definitely fit the bill.  Although, the ad was fairly vague, the truck turned out to be a 1979 F250 Ranger XLT 4X4 with a 400ci motor and automatic transmission.  It cranked up, ran, and drove; but there were some issues...

The front hub on the passenger side was not working, although the owner assured me the four wheel drive was working.  No way to tell without fixing the hub.  Also, the truck was completely eaten up with rust.  The area around the frame of the door was especially bad.  It didn't seem to have any monumental mechanical  problems, but the rust was a bit of a deal breaker.  I really didn't want to put time and money into a truck that was rusting to pieces.

Rust at the cab corner

Rust at the front of the bed

Rust above the door


Around this time I found another candidate on Craigslist... Purchase

Sunday, March 31, 2013

Introduction

I want to use this space to document my 1976 Ford F150.  I doubt that I will break any new ground with my work on the truck, but I think it will be fun to look back over the history once in a while and maybe someone will read something that helps them out.